> ## Documentation Index
> Fetch the complete documentation index at: https://docs.graphext.com/llms.txt
> Use this file to discover all available pages before exploring further.
# OpenAI
> Enhance your projects with the latest OpenAI models
This section explains how to obtain an api key from openAI and configure it in a
Graphext team. This allows you to use the OpenAI API in your Graphext projects,
with most notable steps like
[prompt\_ai](/api-docs/analyse/infer/prompt_ai#prompt-ai), which allow for
inferring knowledge and enriching datasets using LLMs.
## Steps
There are two steps to this process:
1. [Get the key from openAI](/documentation/integrations/data-sources/open-ai#get-the-key-from-openai)
2. [Use the key in Graphext](/documentation/integrations/data-sources/open-ai#use-the-key-in-graphext)
## Get the key from openAI
Navigate to [OpenAI - API Keys](https://platform.openai.com/account/api-keys) and generate
a new key. Depending on your permissions, you may ask your manager/employer to
enable them for you.
This should open a screen like this:
 Towards the top right corner you'll see a "Create Secret Key" button. Click it,
and you'll be asked for a name. This name can be anything you want. It's purpose
it's to identify it uniquely, helping you know which keys are spending most.
Once you've created the key, you'll be able to copy it and use it in Graphext.
Once the key is created, you will not be able to see it again. Make sure to
save it in a secure place, like a password manager.
If you lose it, **no worries**. Just delete it from the panel and create a new one.
## Use the key in Graphext
Within Graphext, OpenAI keys are team-scoped. This means that if you or anyone in a team sets
up an OpenAI key, all members of the team will be able to use it.
This also means that for new teams, a key will have to be setup.
To use the key in Graphext, follow these steps:
Go to any team you want to enable the openAI integration on.
Towards the top right corner you'll see a "Create Secret Key" button. Click it,
and you'll be asked for a name. This name can be anything you want. It's purpose
it's to identify it uniquely, helping you know which keys are spending most.
Once you've created the key, you'll be able to copy it and use it in Graphext.
Once the key is created, you will not be able to see it again. Make sure to
save it in a secure place, like a password manager.
If you lose it, **no worries**. Just delete it from the panel and create a new one.
## Use the key in Graphext
Within Graphext, OpenAI keys are team-scoped. This means that if you or anyone in a team sets
up an OpenAI key, all members of the team will be able to use it.
This also means that for new teams, a key will have to be setup.
To use the key in Graphext, follow these steps:
Go to any team you want to enable the openAI integration on.
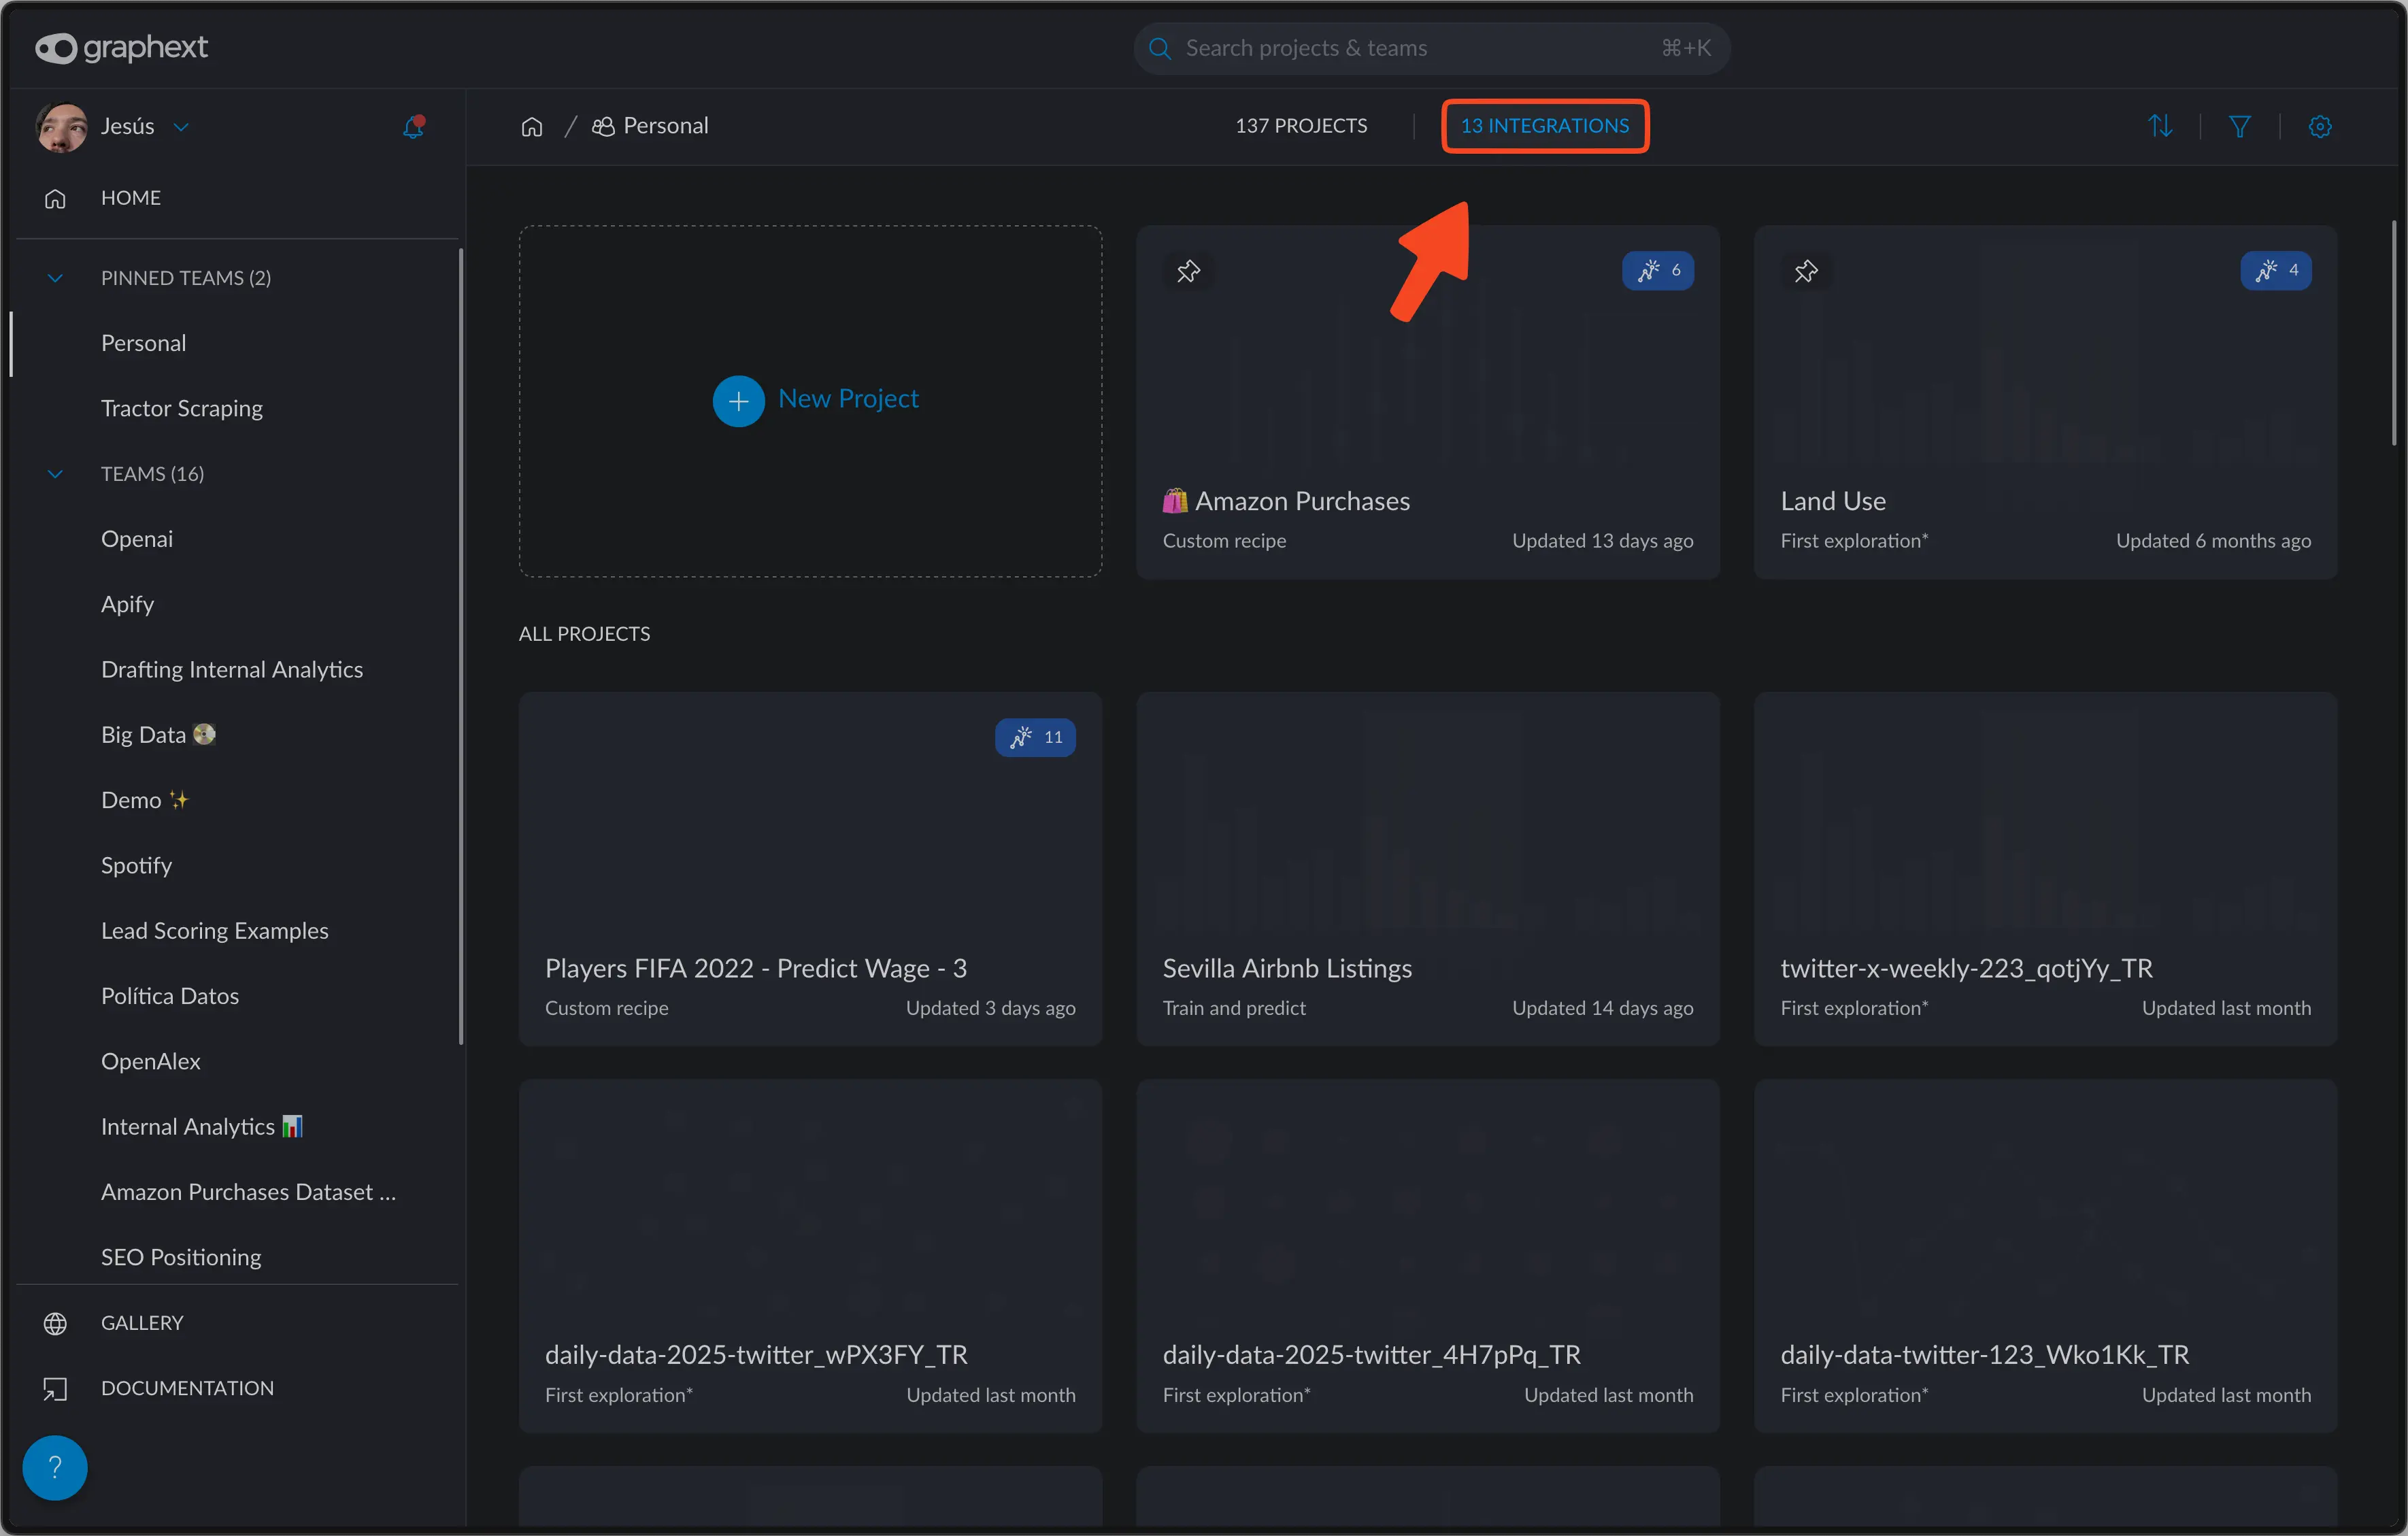
 Click on the "ADD INTEGRATION" button, towards the top center of the page.
If you already have integrations setup, this
button will display how many you have enabled.
Click on the "ADD INTEGRATION" button, towards the top center of the page.
If you already have integrations setup, this
button will display how many you have enabled.
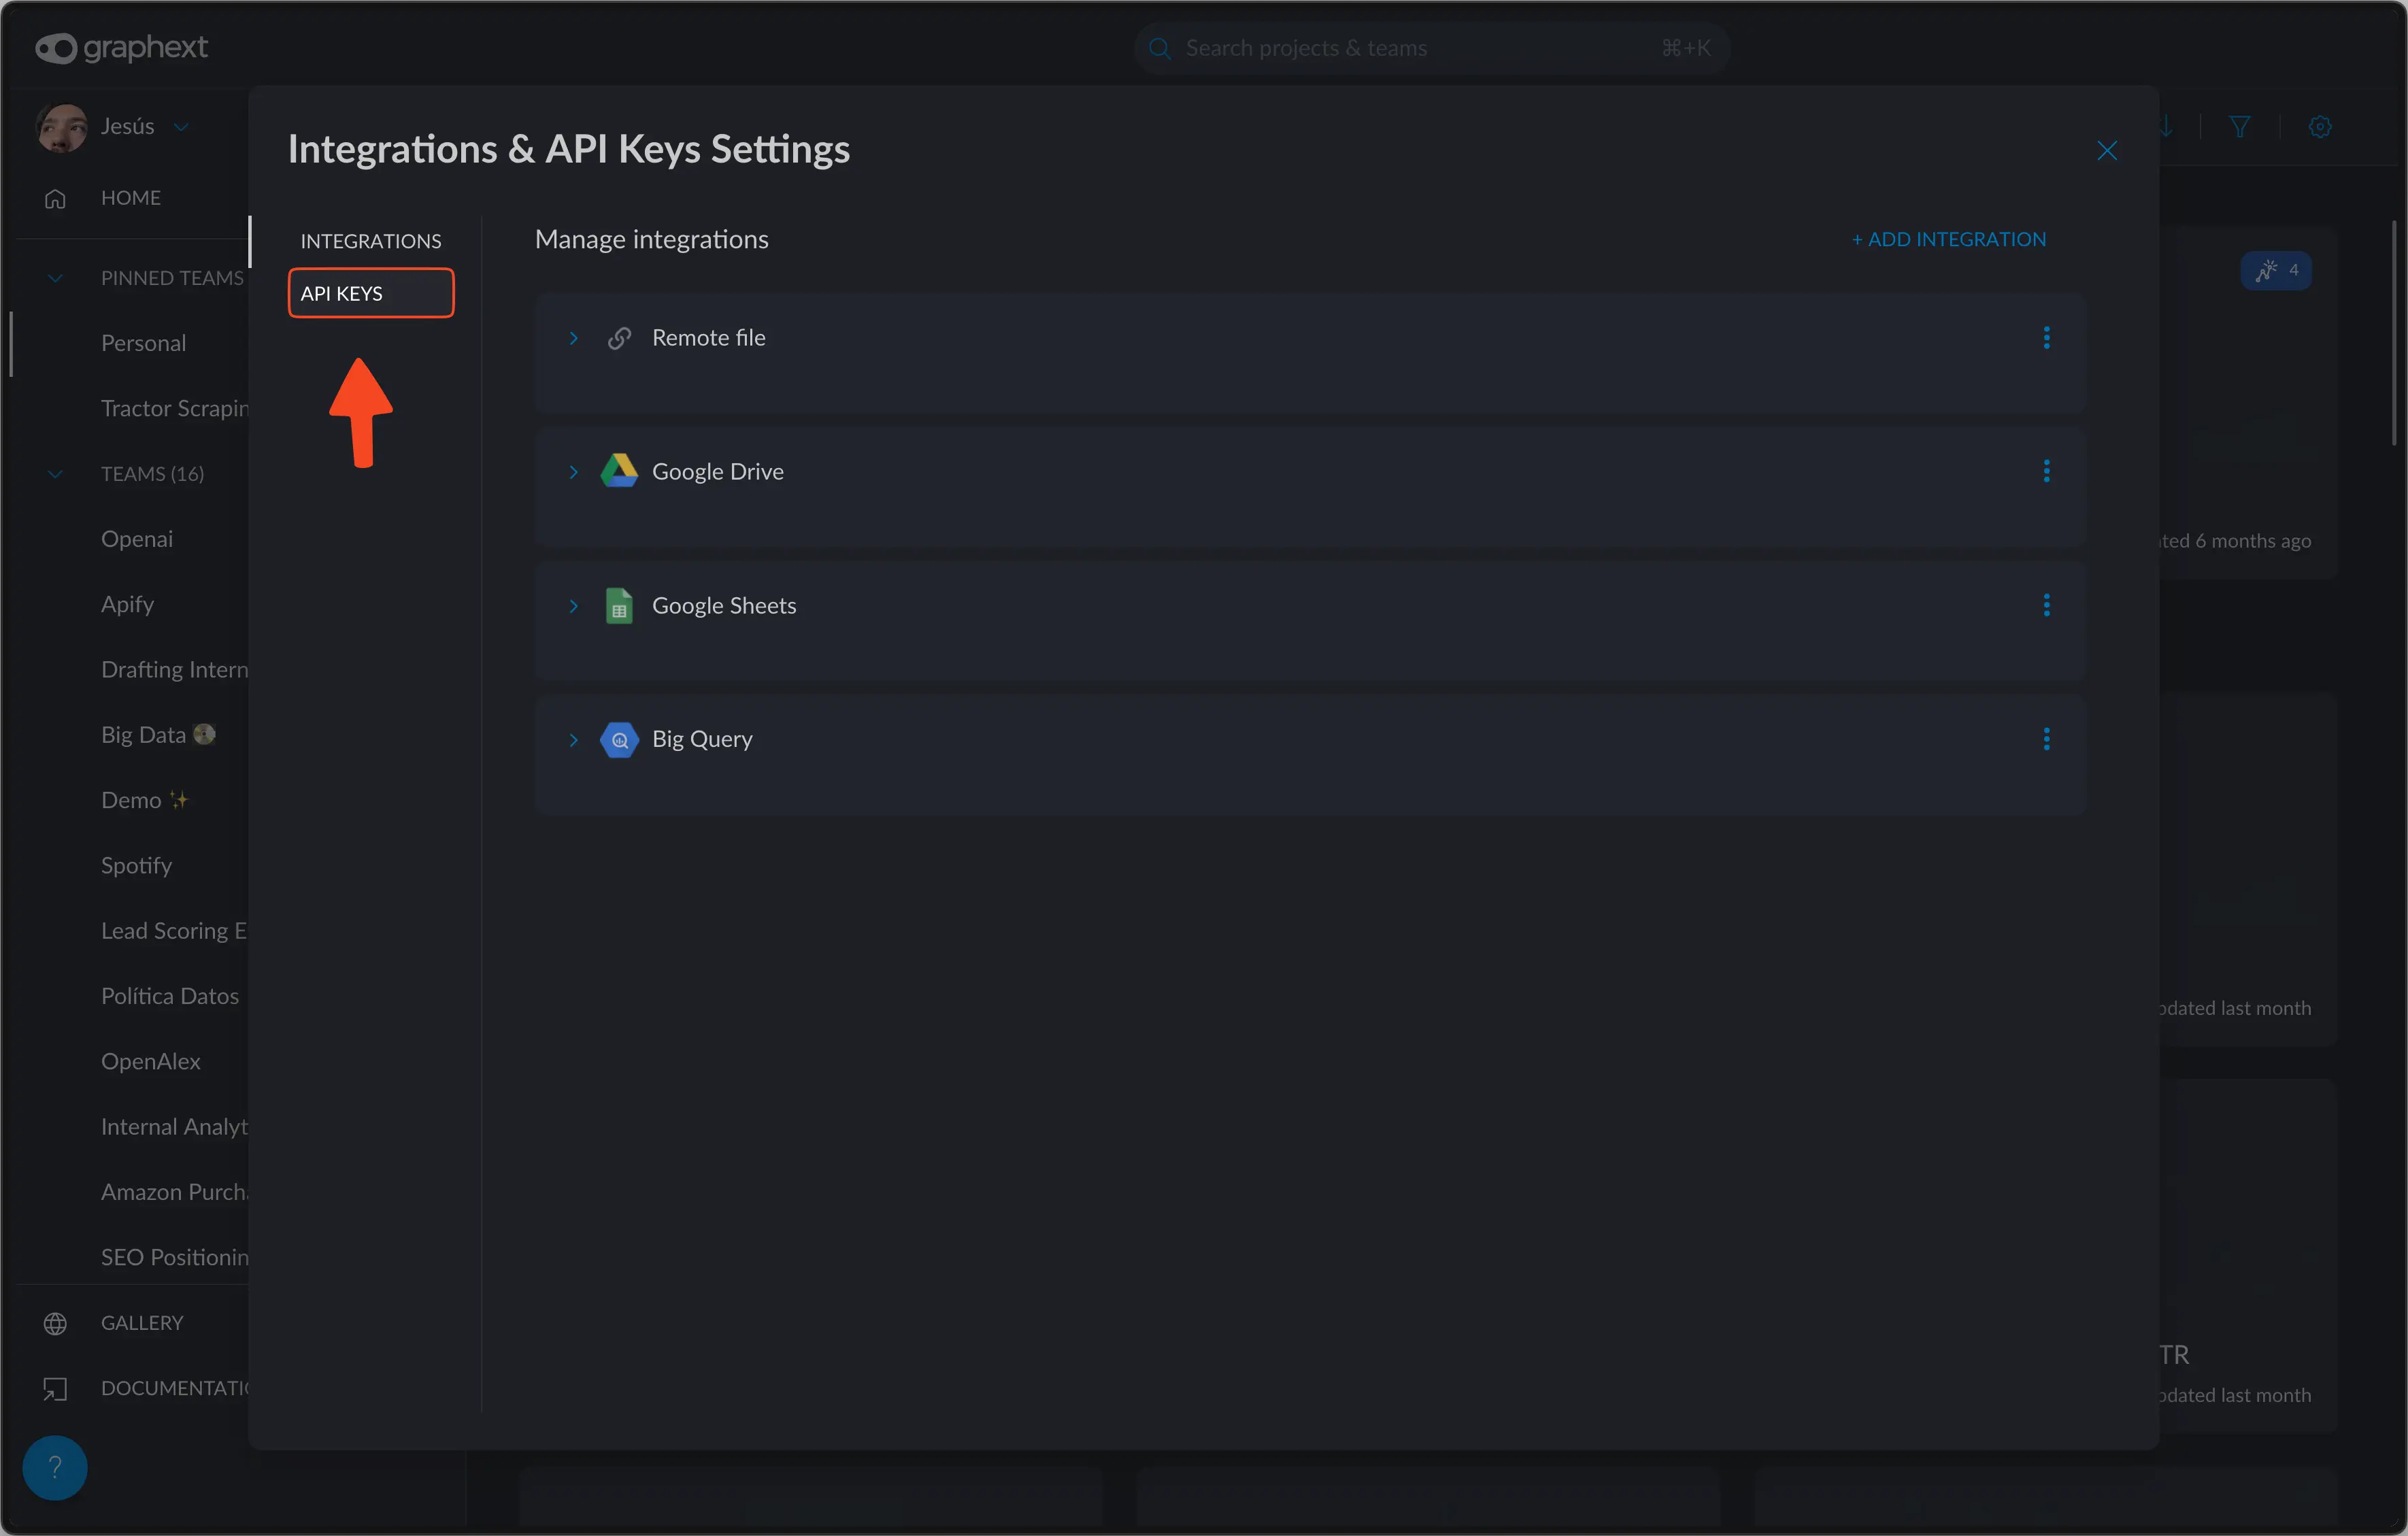
 Towards the top left corner, you'll see an "API Keys" section.
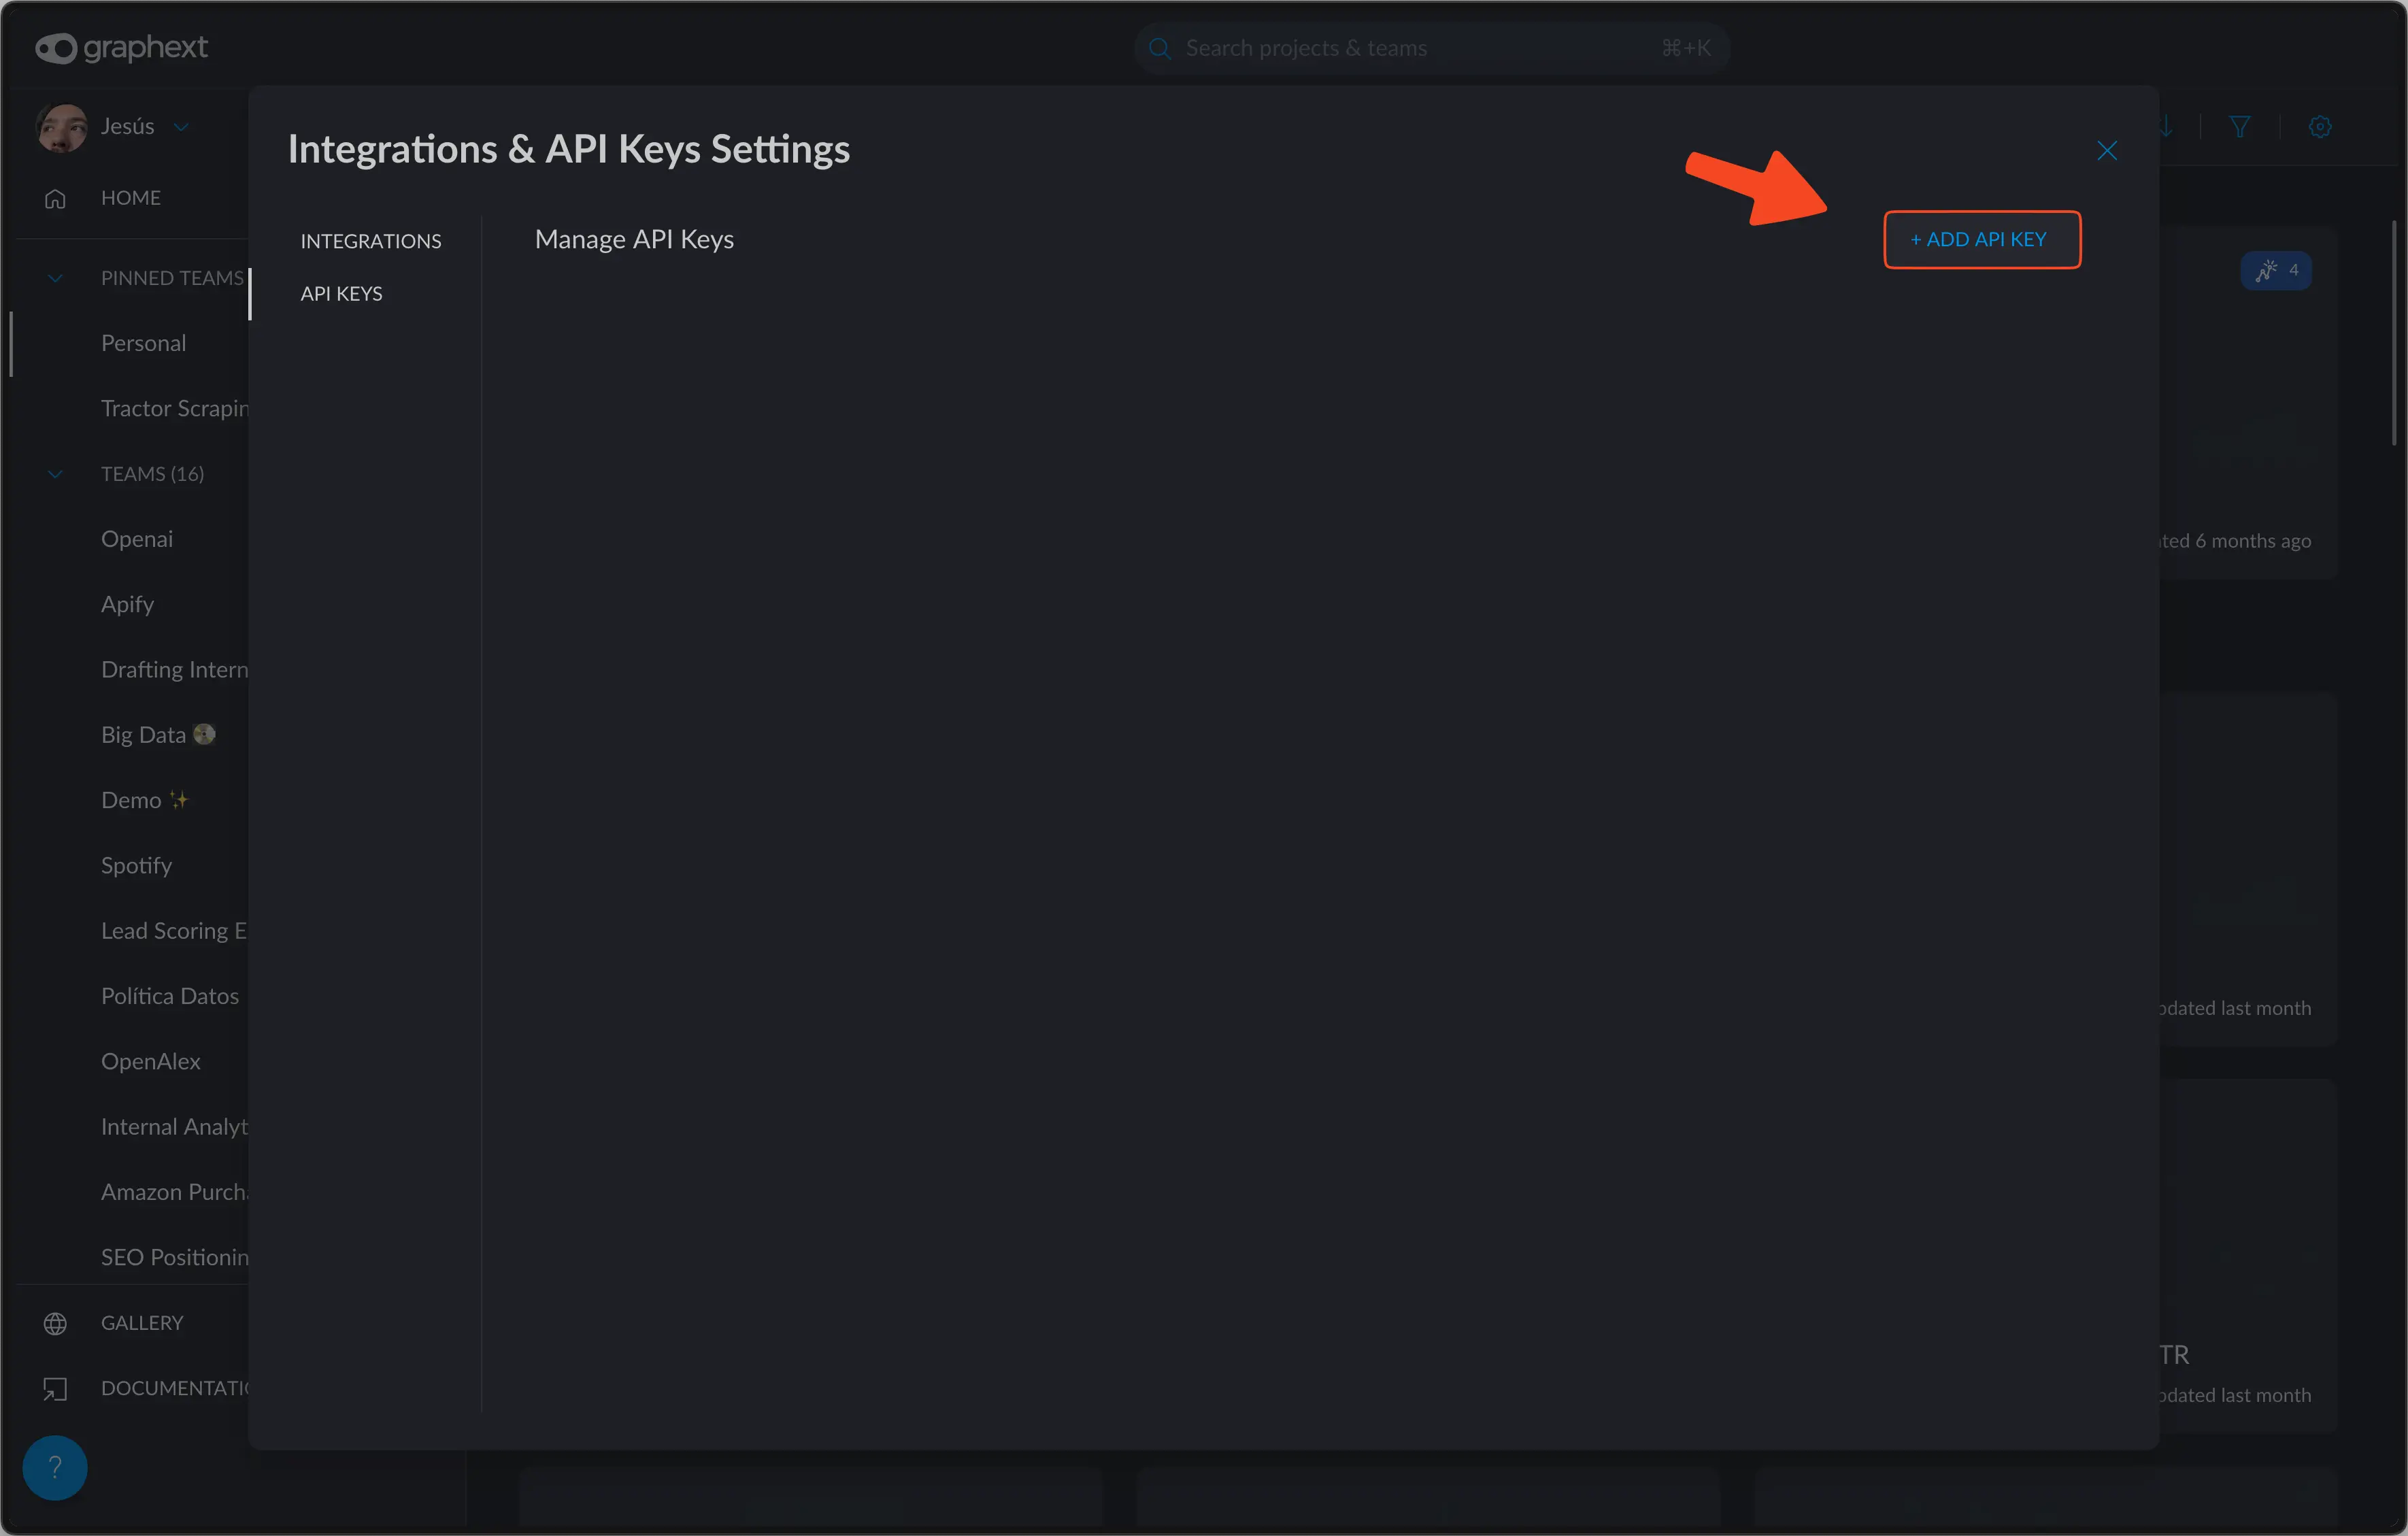
 Towards the top left corner you'll see an "Add API Key" button.
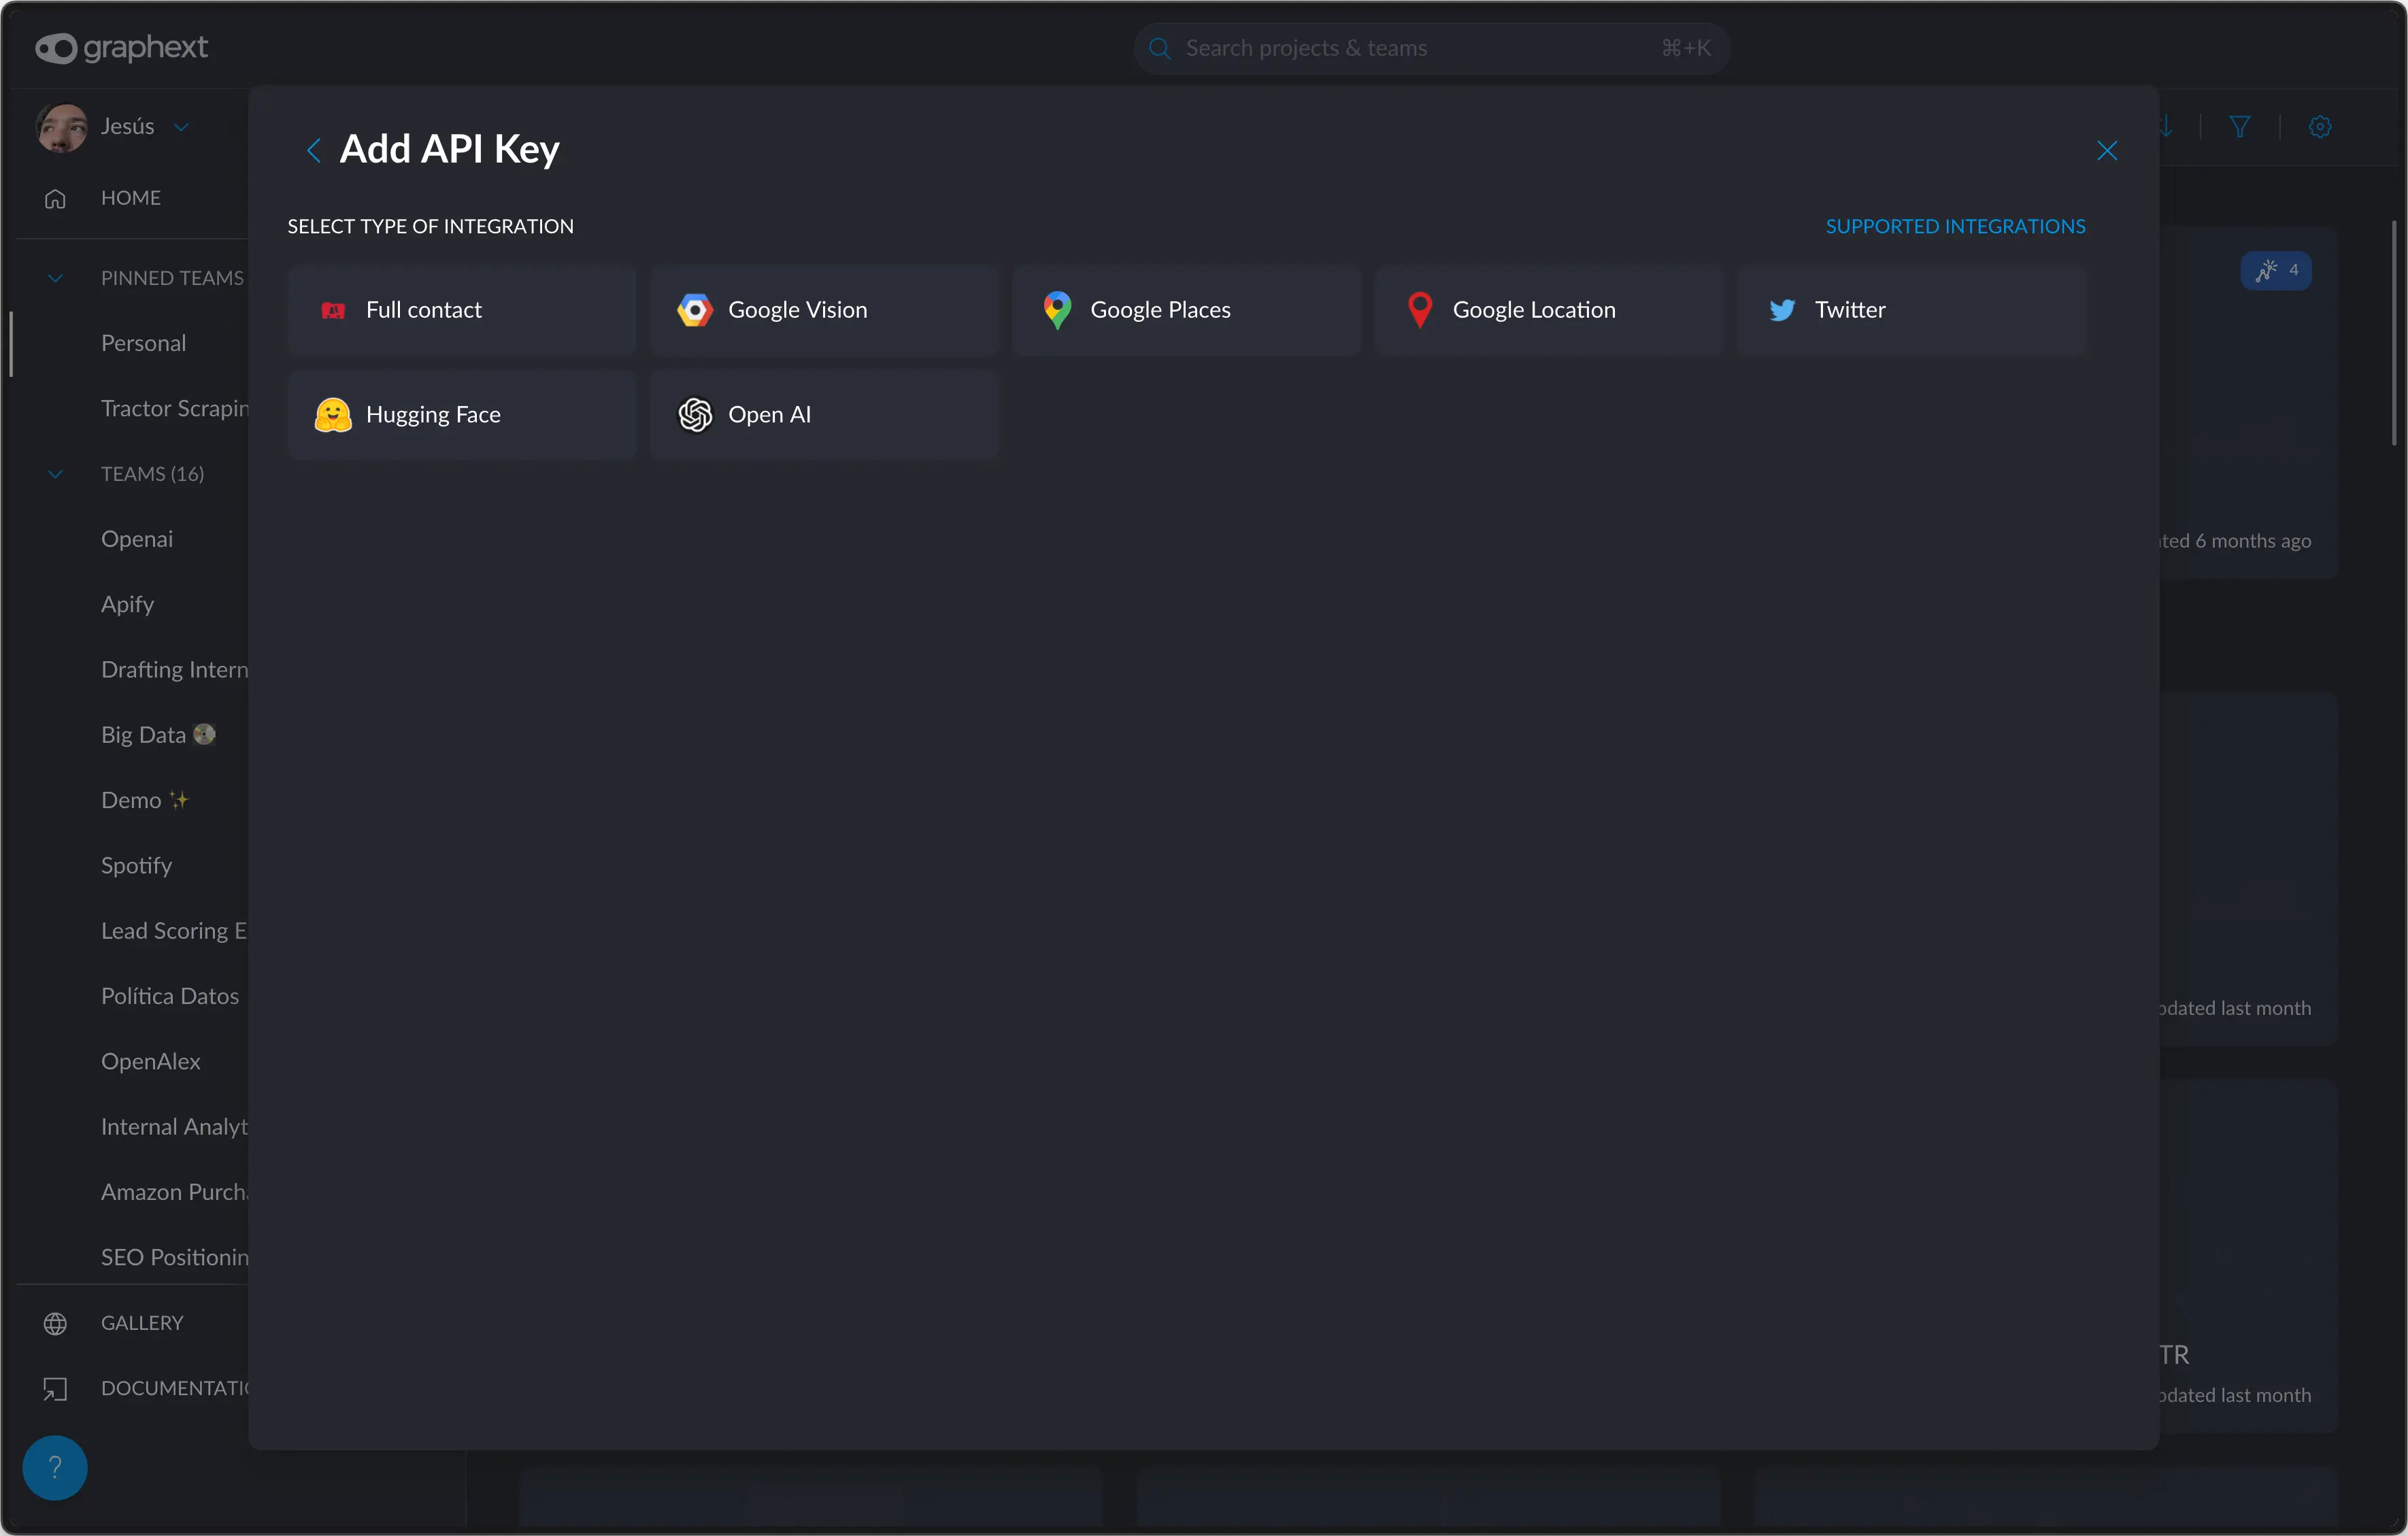
 Click on the "Open AI" icon to input your openAI key.
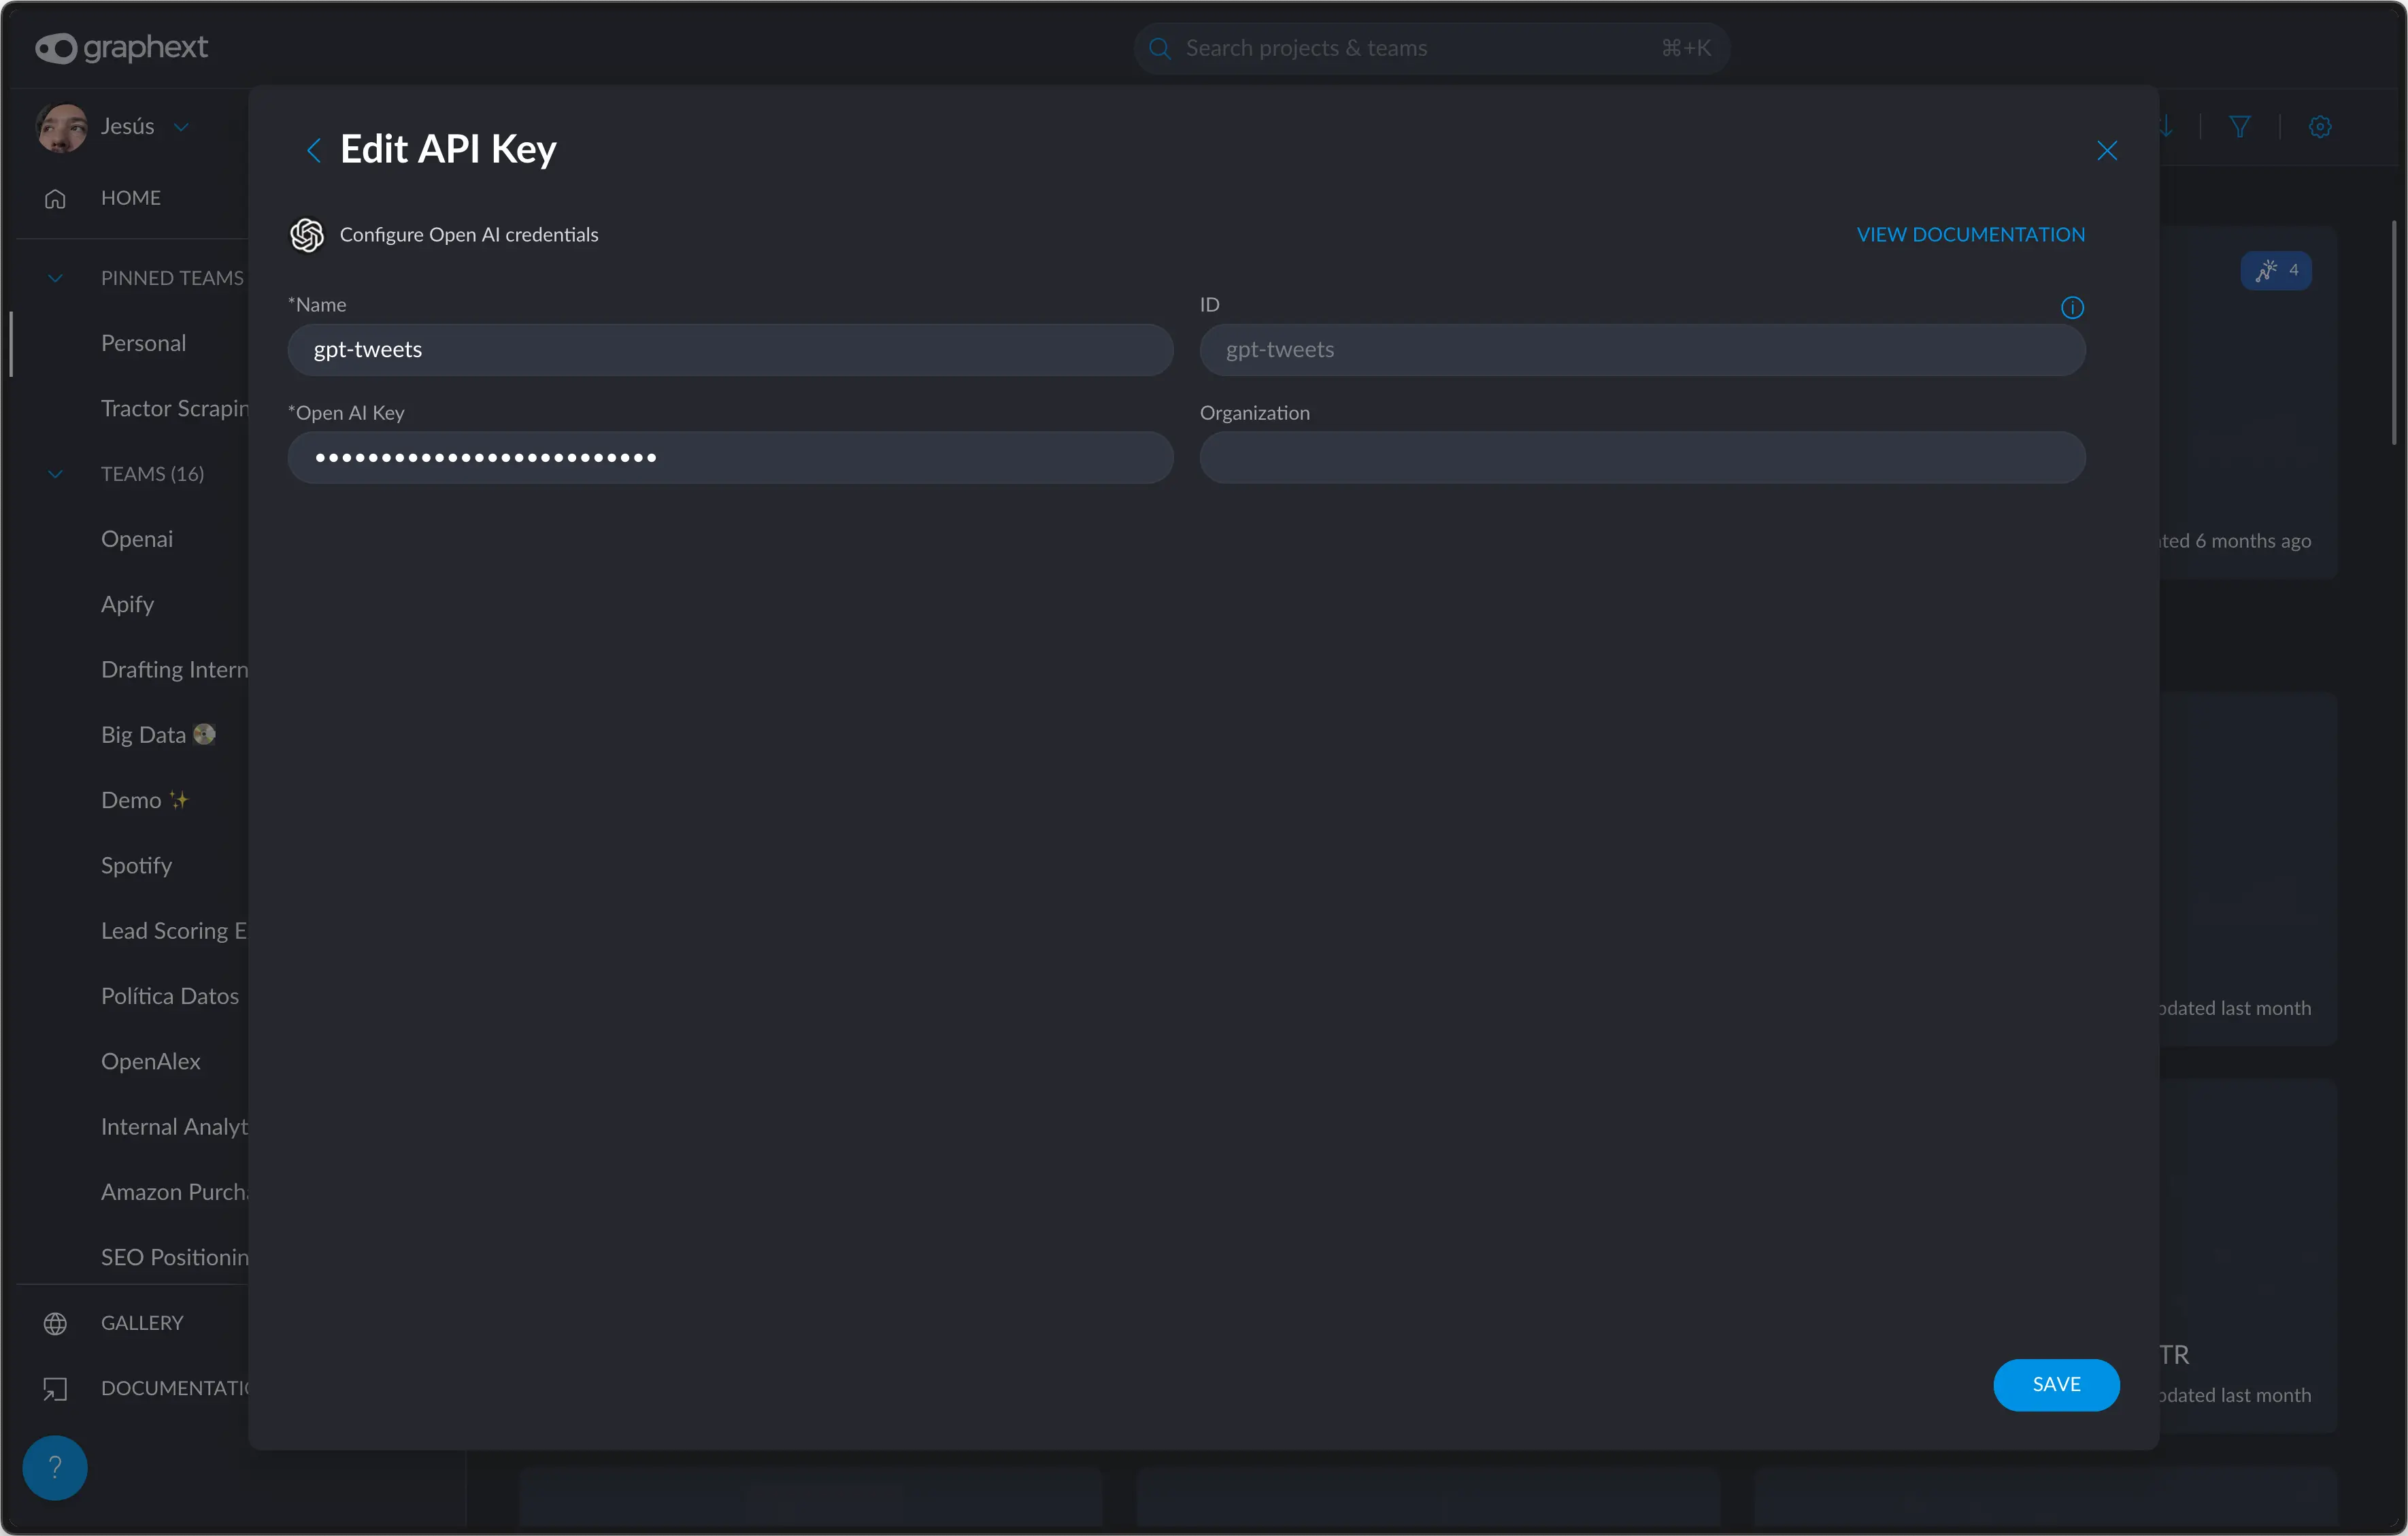
 Input the key in the "Open AI Key" field.
The "**name**" field compulsory. It serves as a unique identifier to use in
your Graphext projects, like in the
[Recipe](/concepts/graphext-concepts/recipe) or the [Wizard](/concepts/graphext-concepts/wizard).
A good rule of thumb is to name it after whatever you're going to use it
for.
In this case, since it's going to help me analyze some tweets, I'll name it
gpt-tweets. I could name it whatever I want, like tweets-analyzer, or
tweets.
Keep in mind that there cannot be two integrations within the same team
that have the same name.
Input the key in the "Open AI Key" field.
The "**name**" field compulsory. It serves as a unique identifier to use in
your Graphext projects, like in the
[Recipe](/concepts/graphext-concepts/recipe) or the [Wizard](/concepts/graphext-concepts/wizard).
A good rule of thumb is to name it after whatever you're going to use it
for.
In this case, since it's going to help me analyze some tweets, I'll name it
gpt-tweets. I could name it whatever I want, like tweets-analyzer, or
tweets.
Keep in mind that there cannot be two integrations within the same team
that have the same name.
 Like that, you can now use the immensely powerful capabilities of LLMs in
Graphext!
Like that, you can now use the immensely powerful capabilities of LLMs in
Graphext!