> ## Documentation Index
> Fetch the complete documentation index at: https://docs.graphext.com/llms.txt
> Use this file to discover all available pages before exploring further.
# Airtable
> Connect Graphext to Airtable and be able to bring your data and write back to your data warehouse recurrently
 ### Guided steps
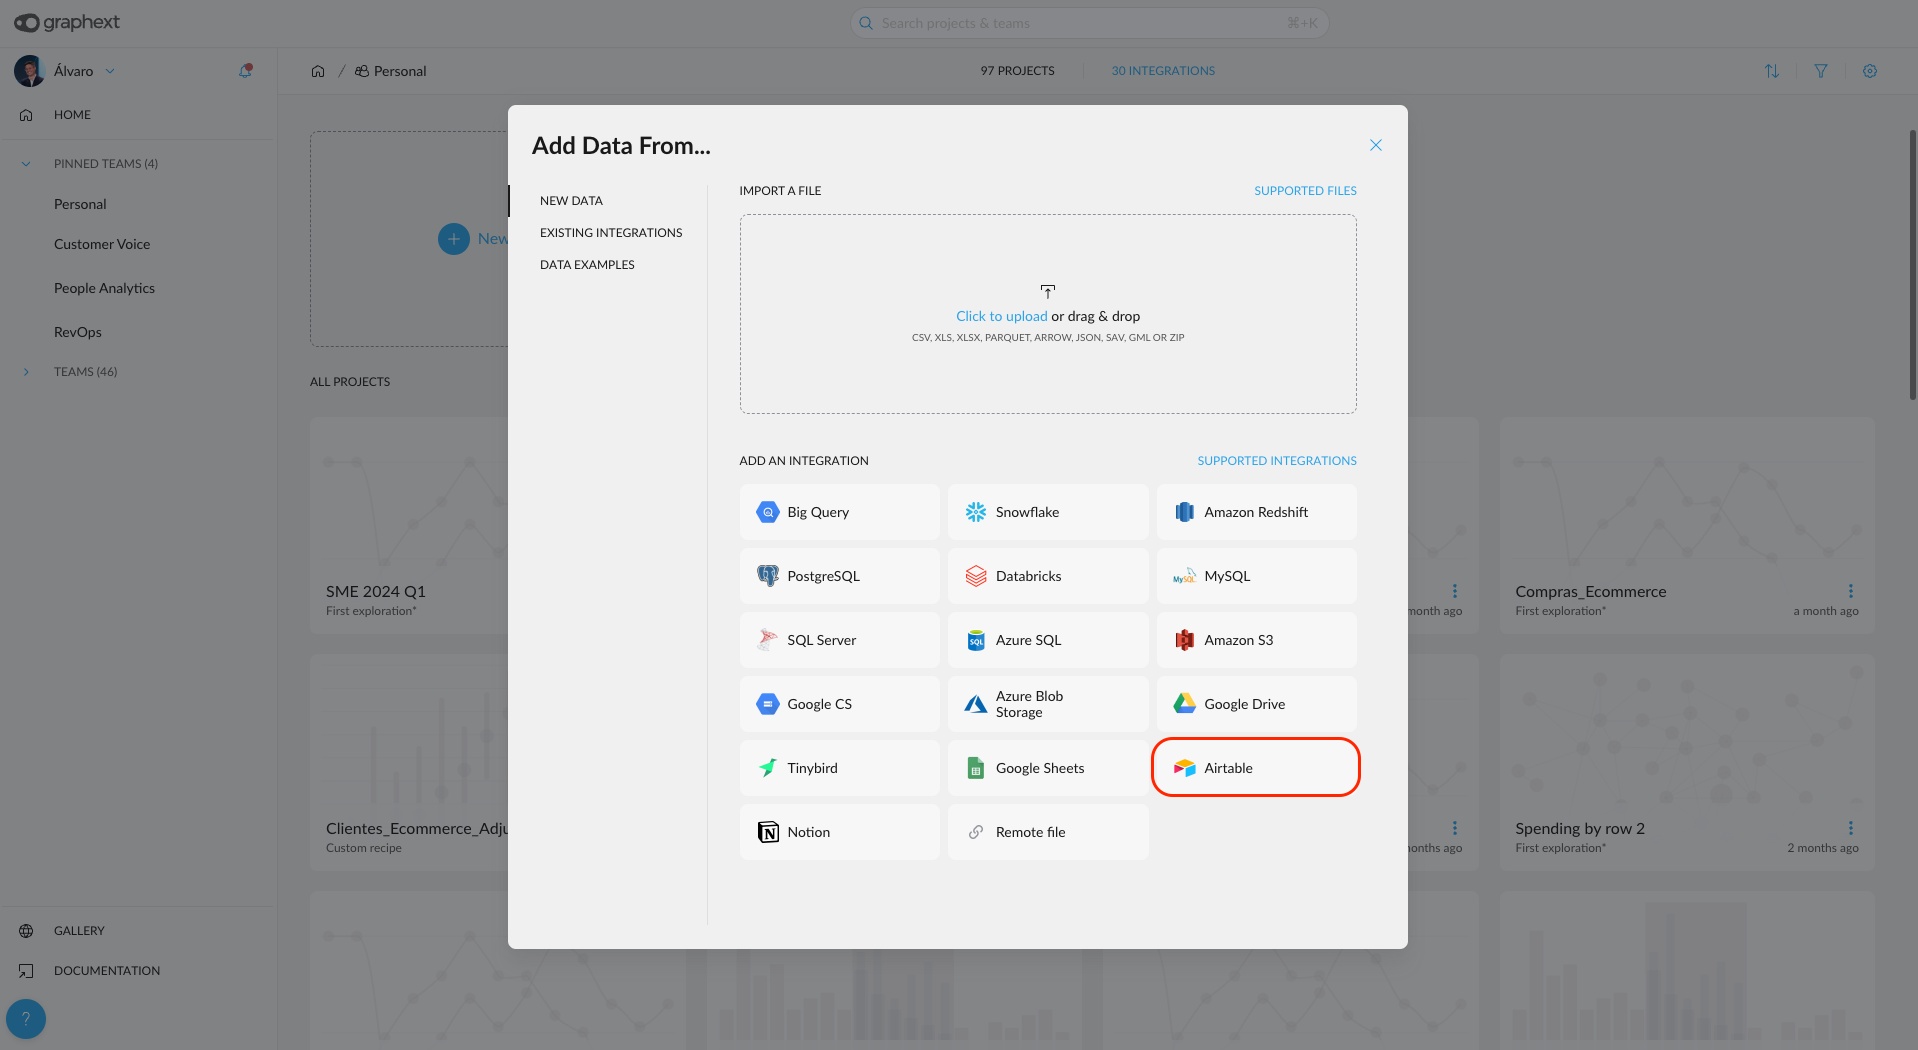
Click on “New Project” (this will add the integration to your personal team) or the “Integrations” button inside the team you want to work on.
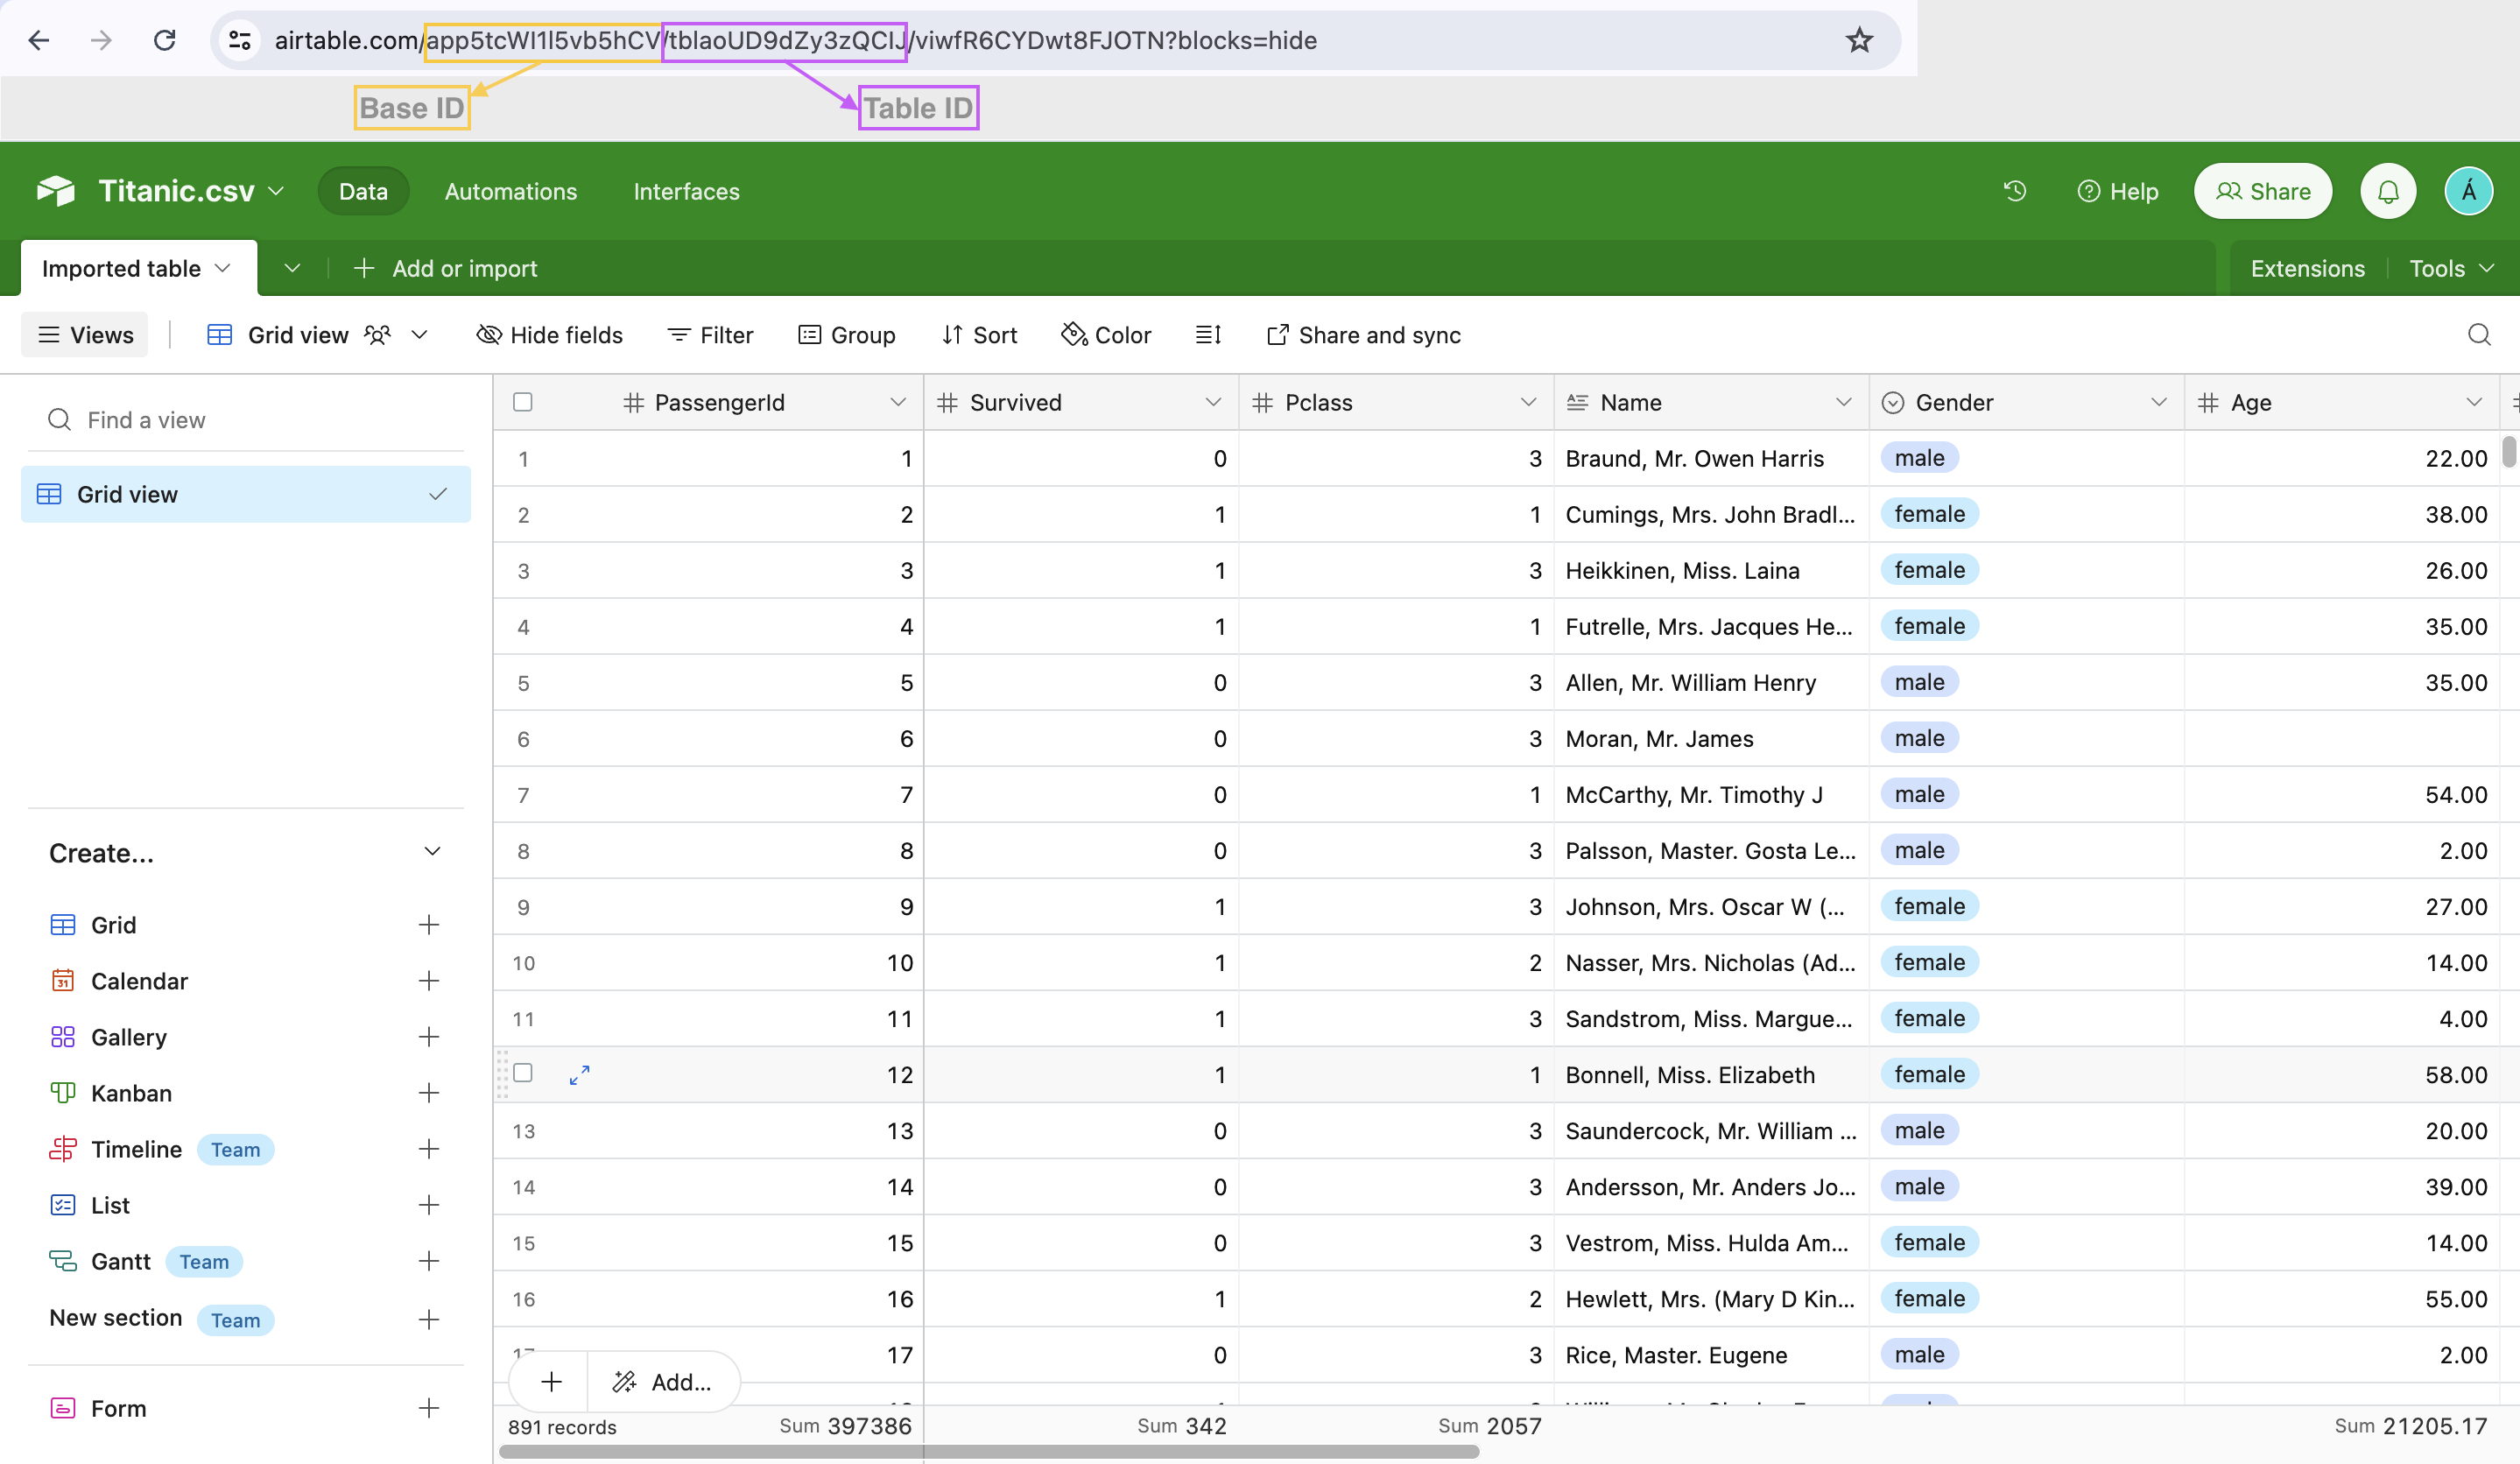
Head to your Airtable and open the dataset you want to import. From the URL you need to extract the **Base ID** and the **Table ID**
* The Table ID is the first part of the URL and starts with "app..."
* The Base ID id the second part of the URL and starts with "tbl..."
### Guided steps
Click on “New Project” (this will add the integration to your personal team) or the “Integrations” button inside the team you want to work on.
Head to your Airtable and open the dataset you want to import. From the URL you need to extract the **Base ID** and the **Table ID**
* The Table ID is the first part of the URL and starts with "app..."
* The Base ID id the second part of the URL and starts with "tbl..."
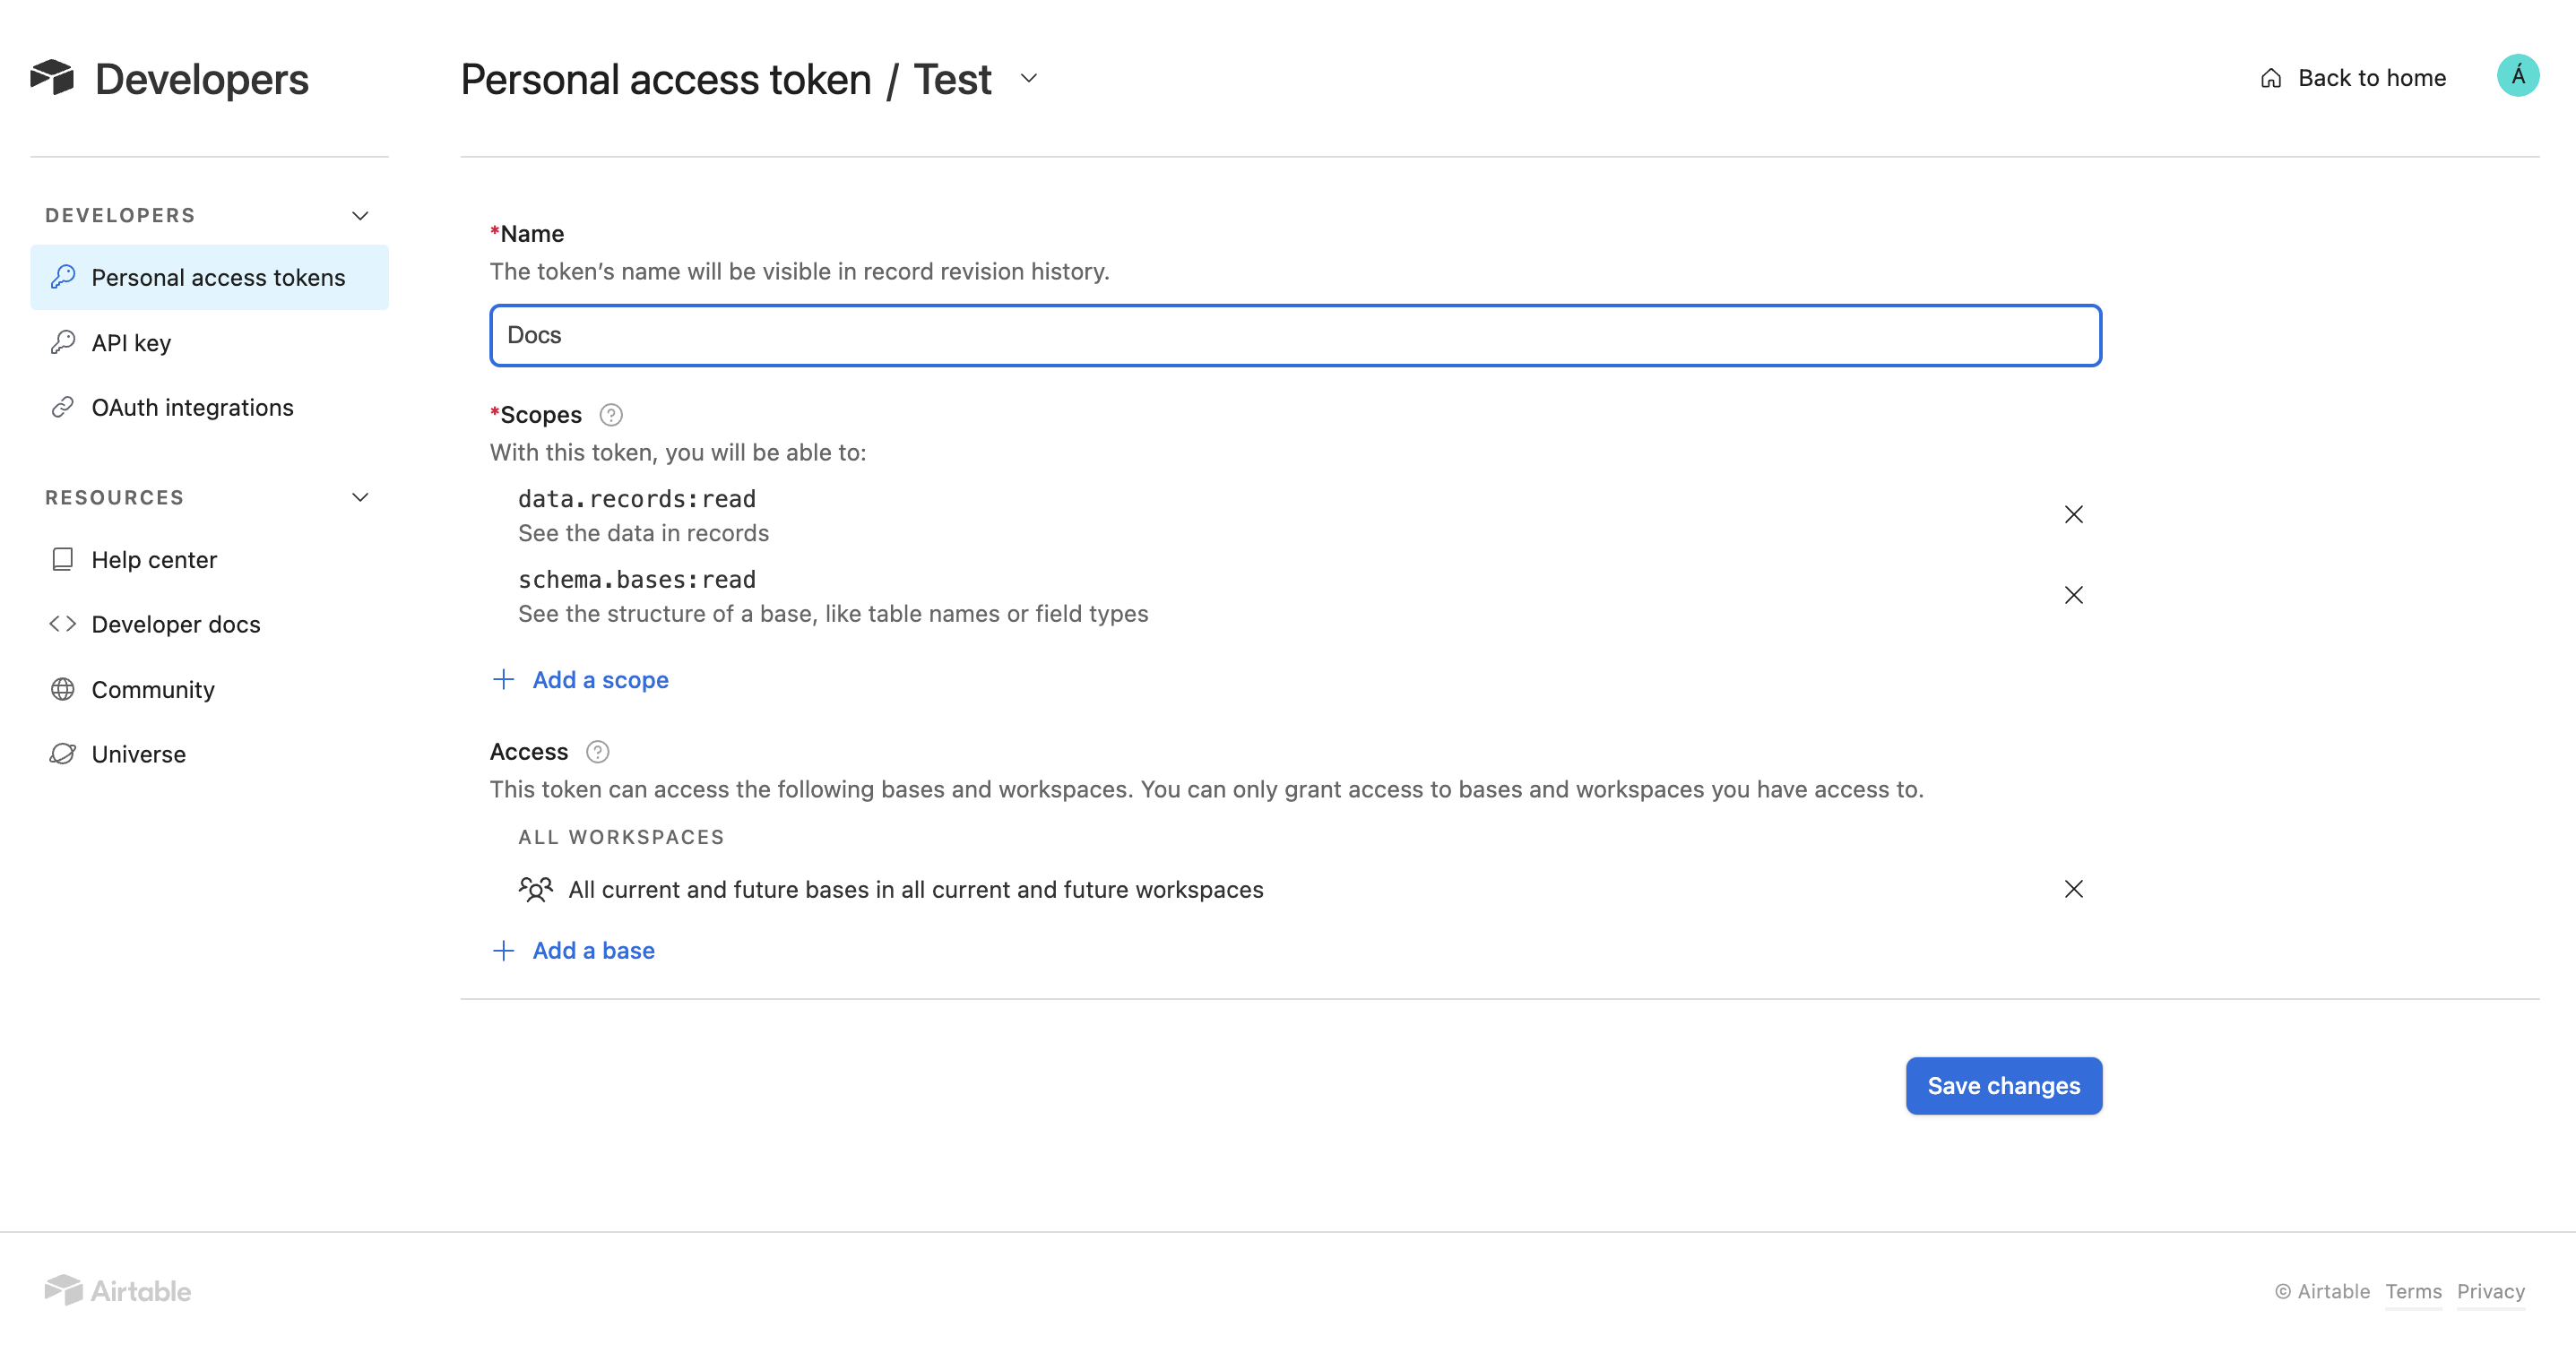
 To obtain the Access Token you need to navigate to [https://airtable.com/create/tokens](https://airtable.com/create/tokens). Click on "Create new token", define the name the scope and the access. At least you should include the two scopes to read (data.records:read and schema.bases:read) and give access to the table you want to import
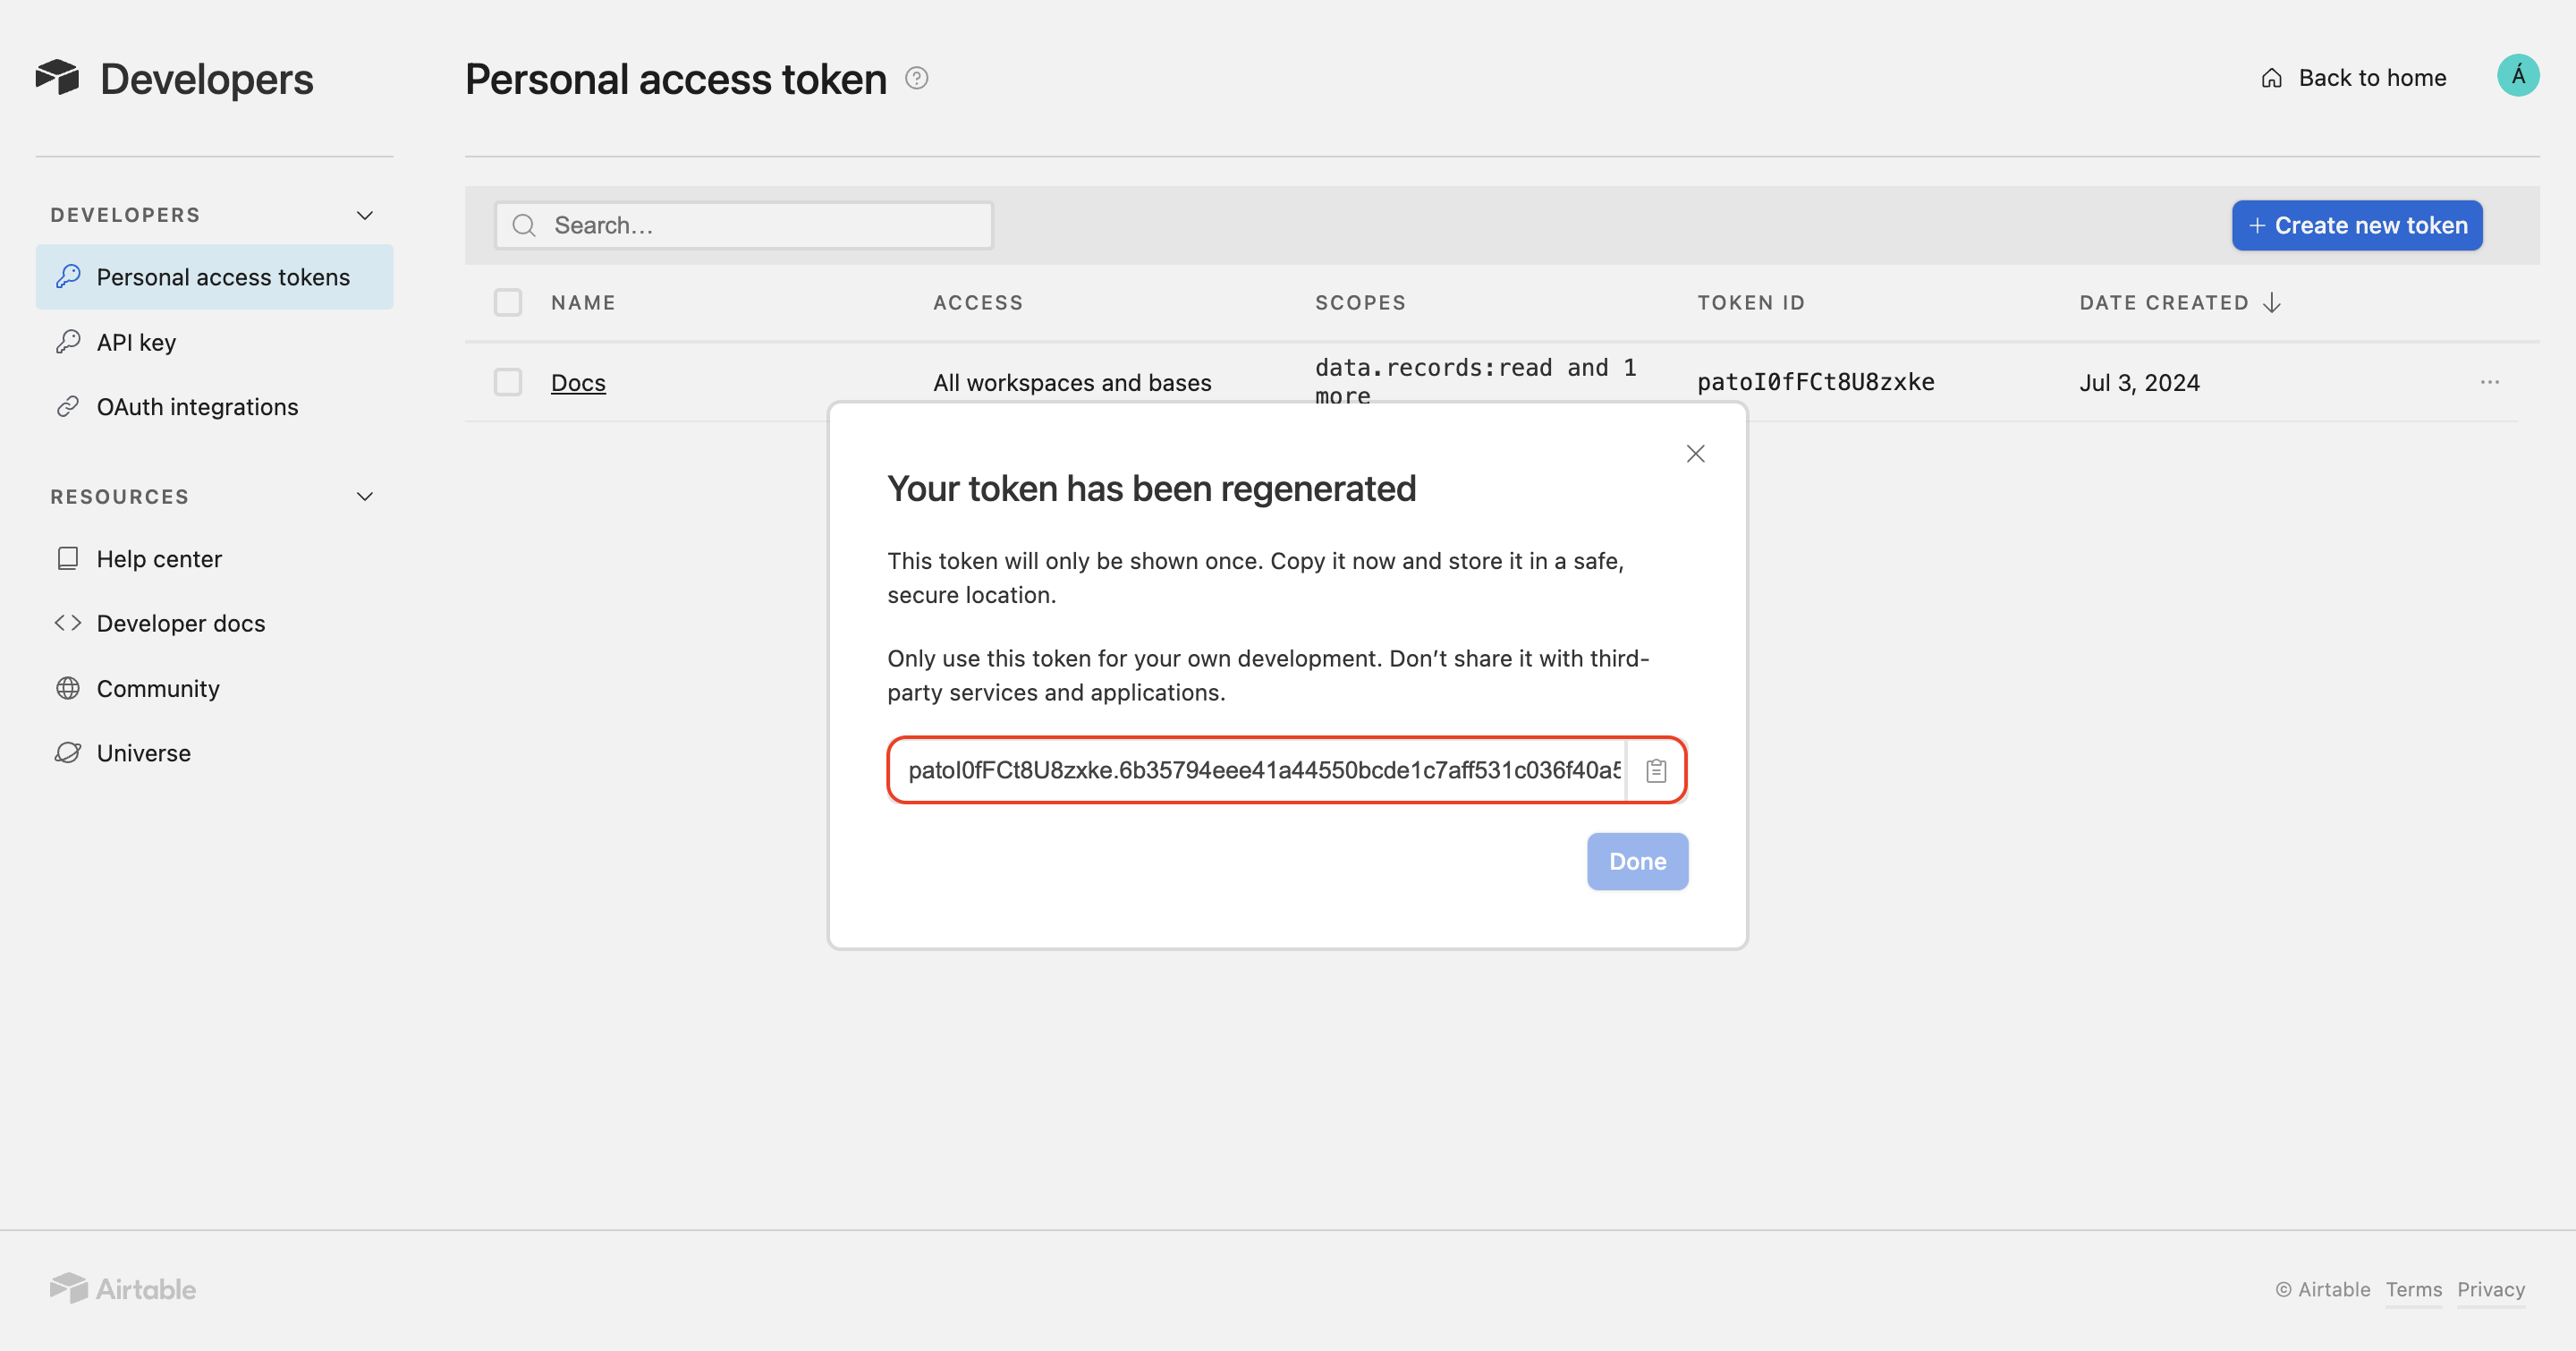
 Copy the generated token
 Finally you need to include the **Table ID** the **Base ID** and the **Access Token** in the Graphext configuration UI
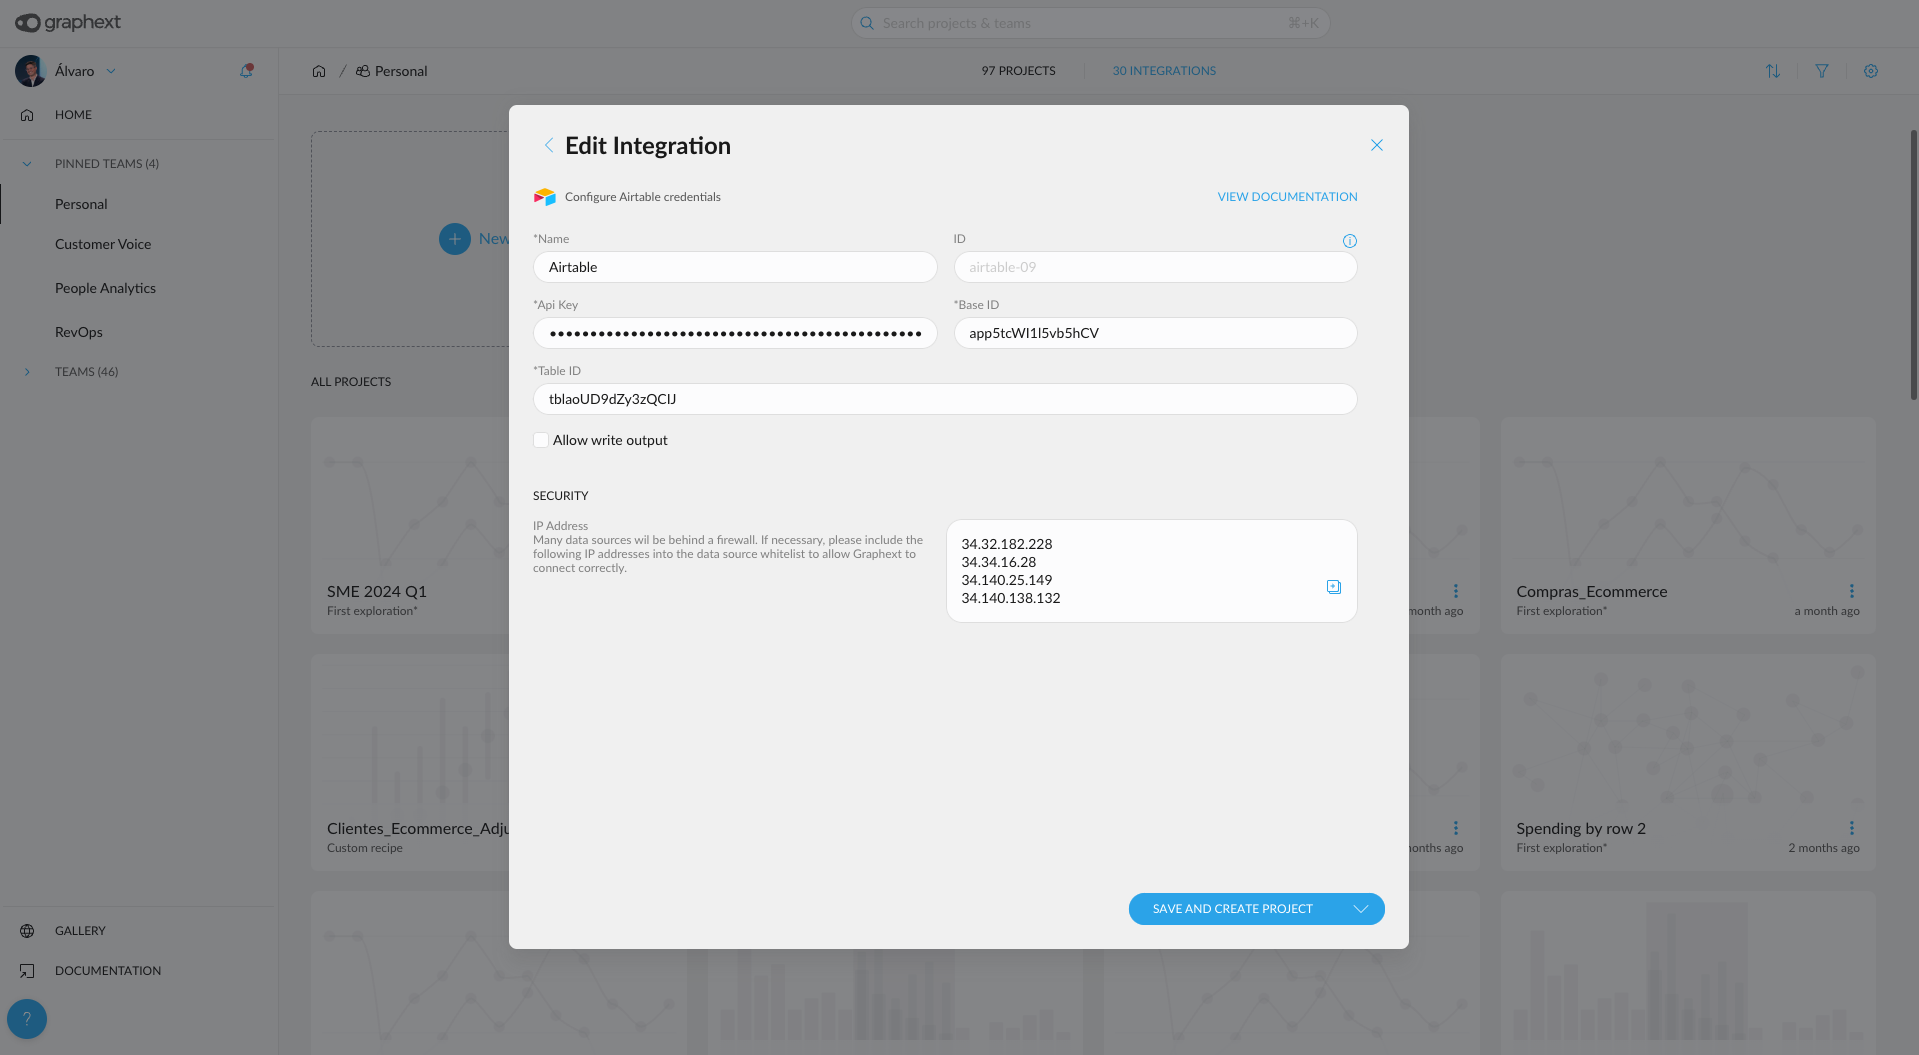 If you want Graphext to write back the project's output to Airtable. Select “Allow write output.” View more documentation about this step in our [API Docs](/api-docs).
Click on “Save and create project” to retrieve your data and begin exploring or “Save” the integration for later use.
If you want Graphext to write back the project's output to Airtable. Select “Allow write output.” View more documentation about this step in our [API Docs](/api-docs).
Click on “Save and create project” to retrieve your data and begin exploring or “Save” the integration for later use.